To get you started, here is a walk through of the main features of Milestone Planner, from when you sign in, to when you finish a project.
Open a project
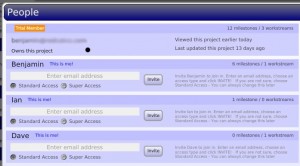
Projects are the main spaces in Milestone Planner and most of the action is focused on them. Each project has a team, which can be listed by clicking “people”. That team might be just you, but there is no reason to work alone! Invite as many people as you need to and share your project plan with them.

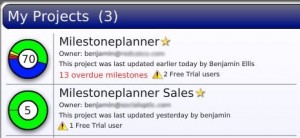
Clicking on “My Projects” gives you an overview of the projects you are working on, and a detailed status of each one. It is also the place where you can create new projects and delete old ones.
Set your Milestones
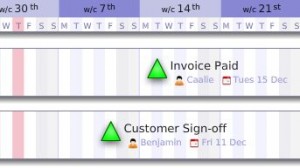
Rather than make a project a to do list that doesn’t get done, we look at it as a series to things to be achieved on the way to completion: Milestones. Milestones mark the places you go past on your way to successfully completing the project.
Personally, I like to work backwards when I build a project plan – clicking on the striped timeline to create a final milestone at the end of the project, then adding milestones to the left of that, marking the things that lead up to it. You can add milestones in any order you like, systematically or just as you think of them. Just ensure that they are clear and achievable. The vertical red bar indicates today’s date.

Organise with Workstreams
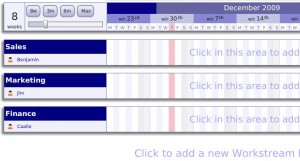
A big project sometimes has hundreds of milestones, so grouping them together helps organise things more neatly. Even with a small project it can make sense to group milestones together – perhaps by the team that is responsible for them, or the place where they are happening. In Milestone Planner these groupings are called Workstreams and are shown as horizontal boxes. You can create as many or as few as you need, and even add a little descriptive overview for each one if you would like.

See Things Getting Done
You can mark each Milestone complete (which turns it blue) as it is achieved – or assign an owner to a milestone, invite them to the project, and they can mark it done for you. No need for emails or voicemail tennis. You can add notes to any Milestone, and in the pro version you can see a full history of all the changes since the milestone was created.
If you are going to be a little late with a milestone you can click and drag it along the time-line to it’s new target date – or perhaps delight everyone by being a little ahead of time and dragging it to the left to an earlier date.
People don’t always see the world in blue and green, so you can also switch a milestone to amber/yellow, orange or red by clicking on it. We leave it up to you and your team to choose what each means to you, but Blue always means done/complete and milestones start their lives as green triangles.

Know Exactly How Your Projects Are Doing
![]()
When you come back to a project, you will see any updated milestones highlighted with a gold star. If you want to know more about a change, just click on the milestone to see the recent changes. You can zoom in and out to choose how many weeks of the timeline you see at once, or scroll along the timeline to inspect longer projects. If things are still looking a bit cluttered, it can help to hide the milestone details for a while, using the detail toggle.
We really hope that you enjoy using Milestone Planner and are always open to hearing ways to make it a more satisfying experience. Login, or leave us a comment here, and you can send feedback at anytime from within the application itself.


This is a really silly thing, but you don’t specify that the milestone should be placed on the day that it is due and not on the date that it is started.
I have just started collaborating with somone on a new project plan and they thought my timescales were all late :-p
I had the same misunderstanding. :)
Hello George!
We’ve added the word ‘by’ to clarify things a little. We encourage people to thing ‘outcomes’ rather than ‘activities’. As opposed to building a to do list, think about it as build a plan for the things you will have achieved. e.g. “10 new customers signed up”. “new shop front agreed”. It’s a slightly different way of thinking, and helps you achieve more things, with less stress!
Of course, you are free to build your plans anyway you want to! We want milestone planner to be as flexible as possible, but we want our community to be as successful as possible in their businesses too!
Aha!….. that makes sense. Thanks!
This makes total sense. I love the graphical interface. Thank you!